Overview of the Feature
This feature automatically syncs ECPower customer segments with Shopify Customer Tags.
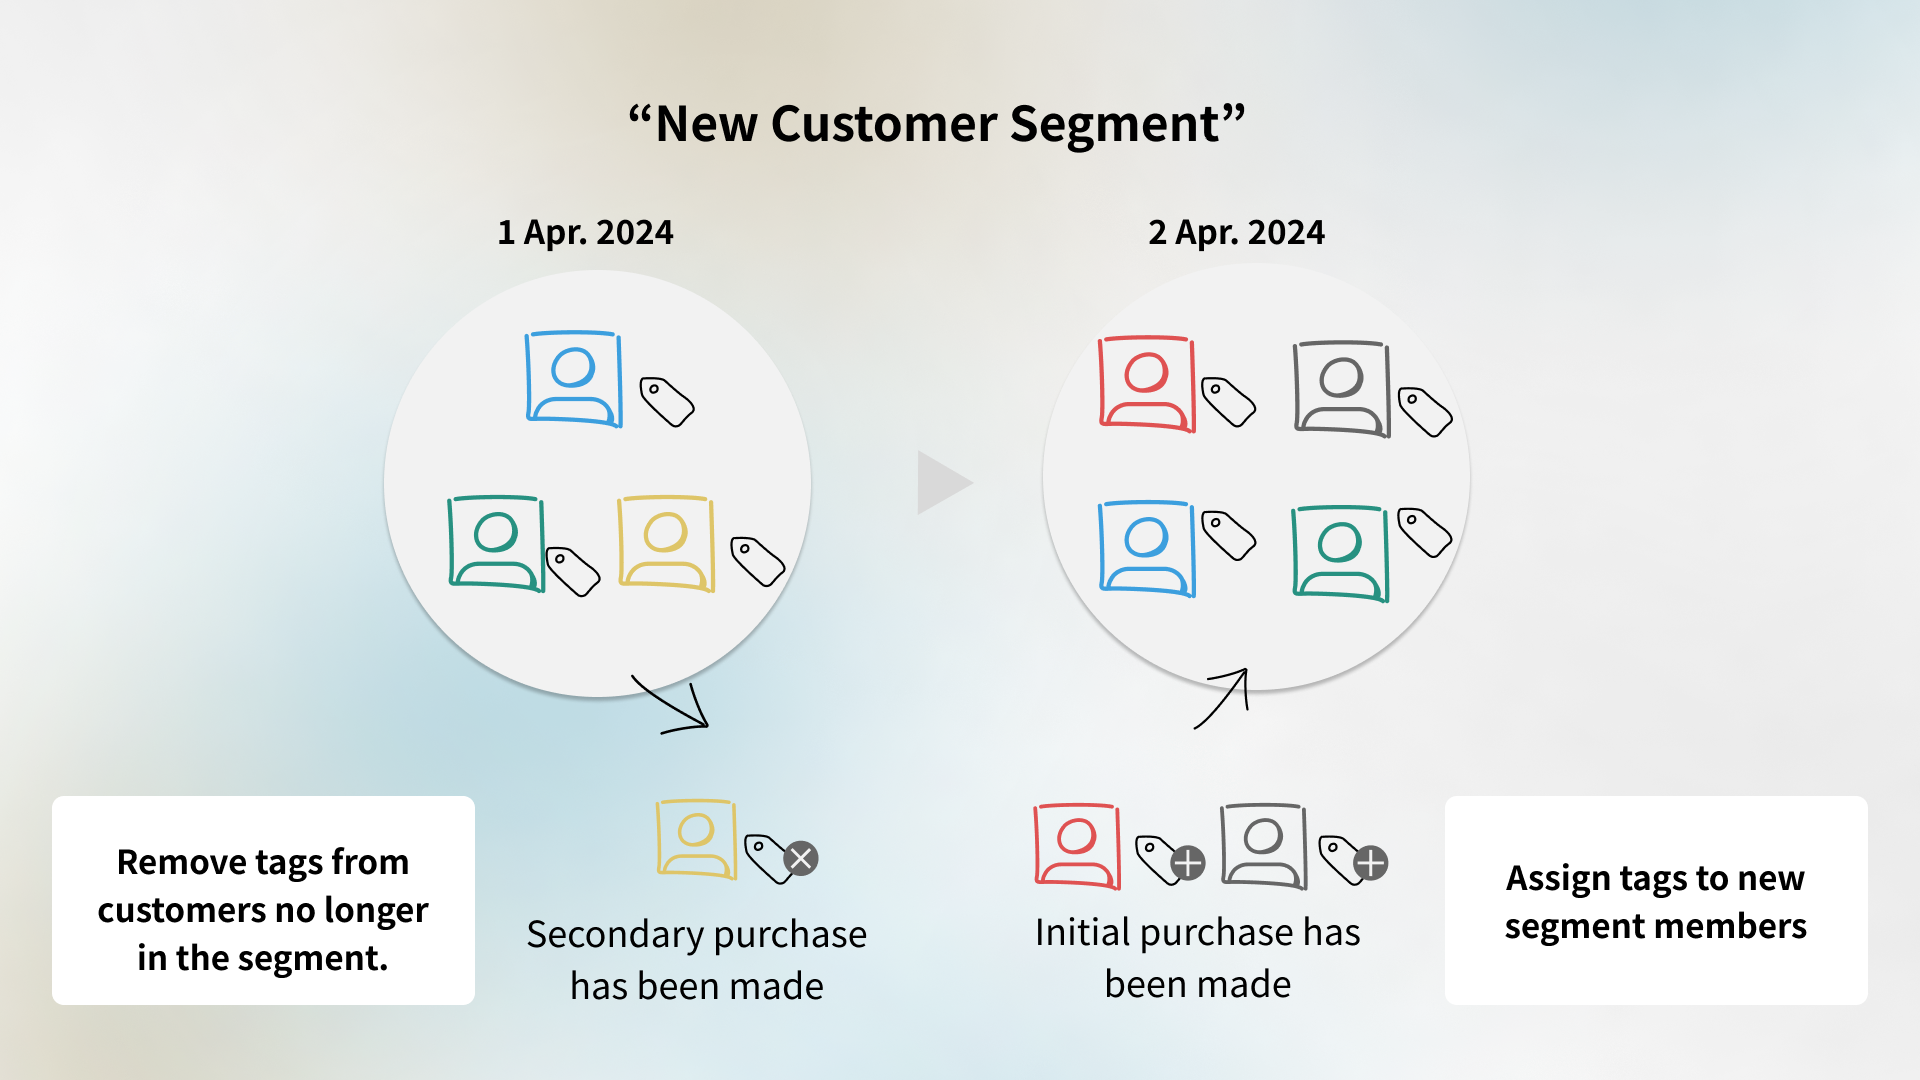
Every day, the following automatic sync processes occur:
- Assigning Shopify customer tags to new members of customer segments.
- Removing Shopify customer tags from customers who are no longer in a segment.
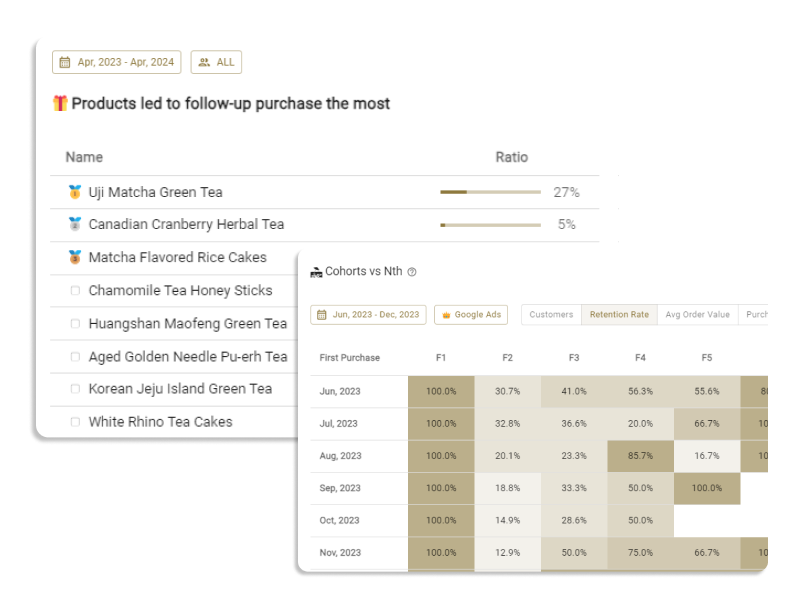
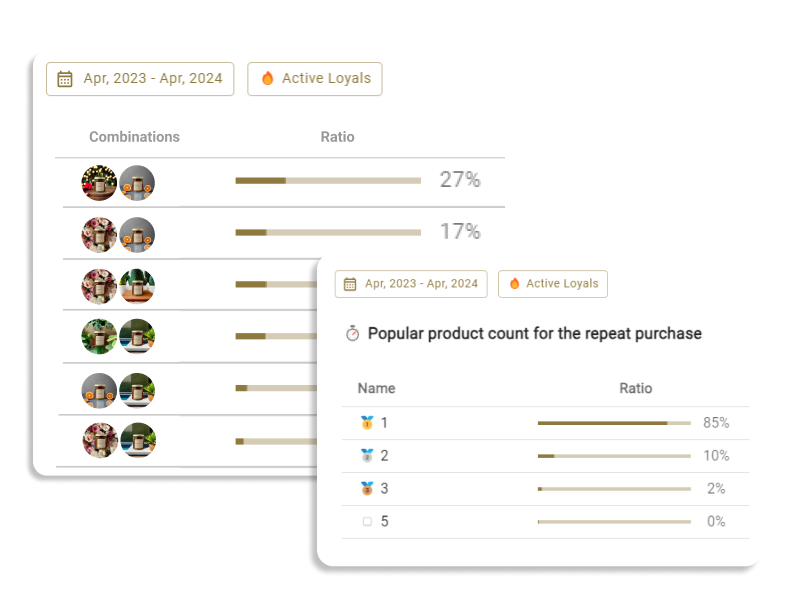
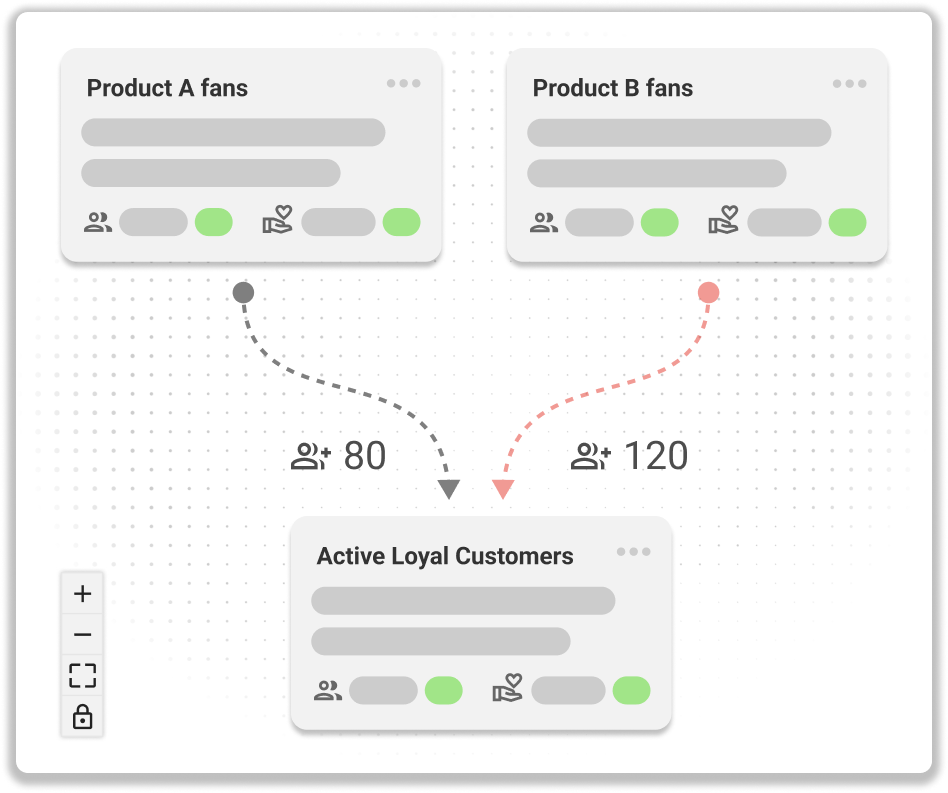
Using this feature allows any tool that can filter by Shopify customer tags to utilize ECPower customer segments.
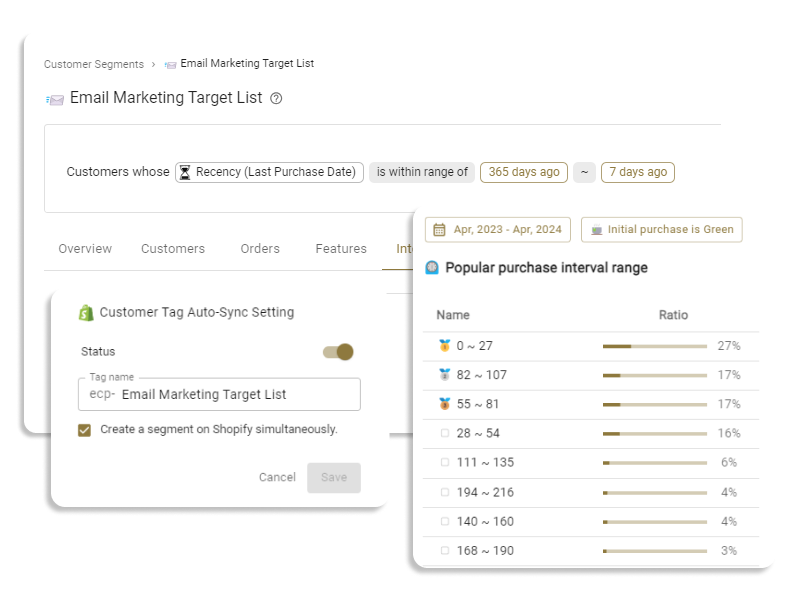
Activate Automatic Sync
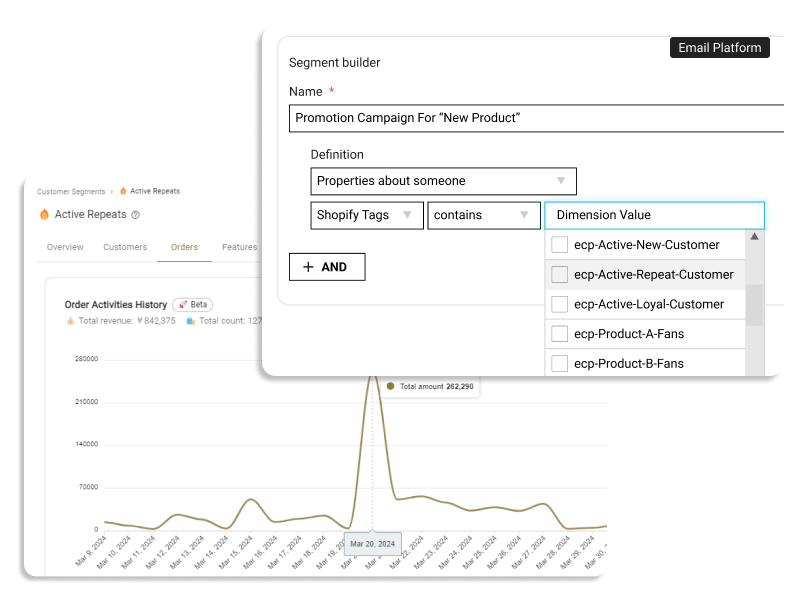
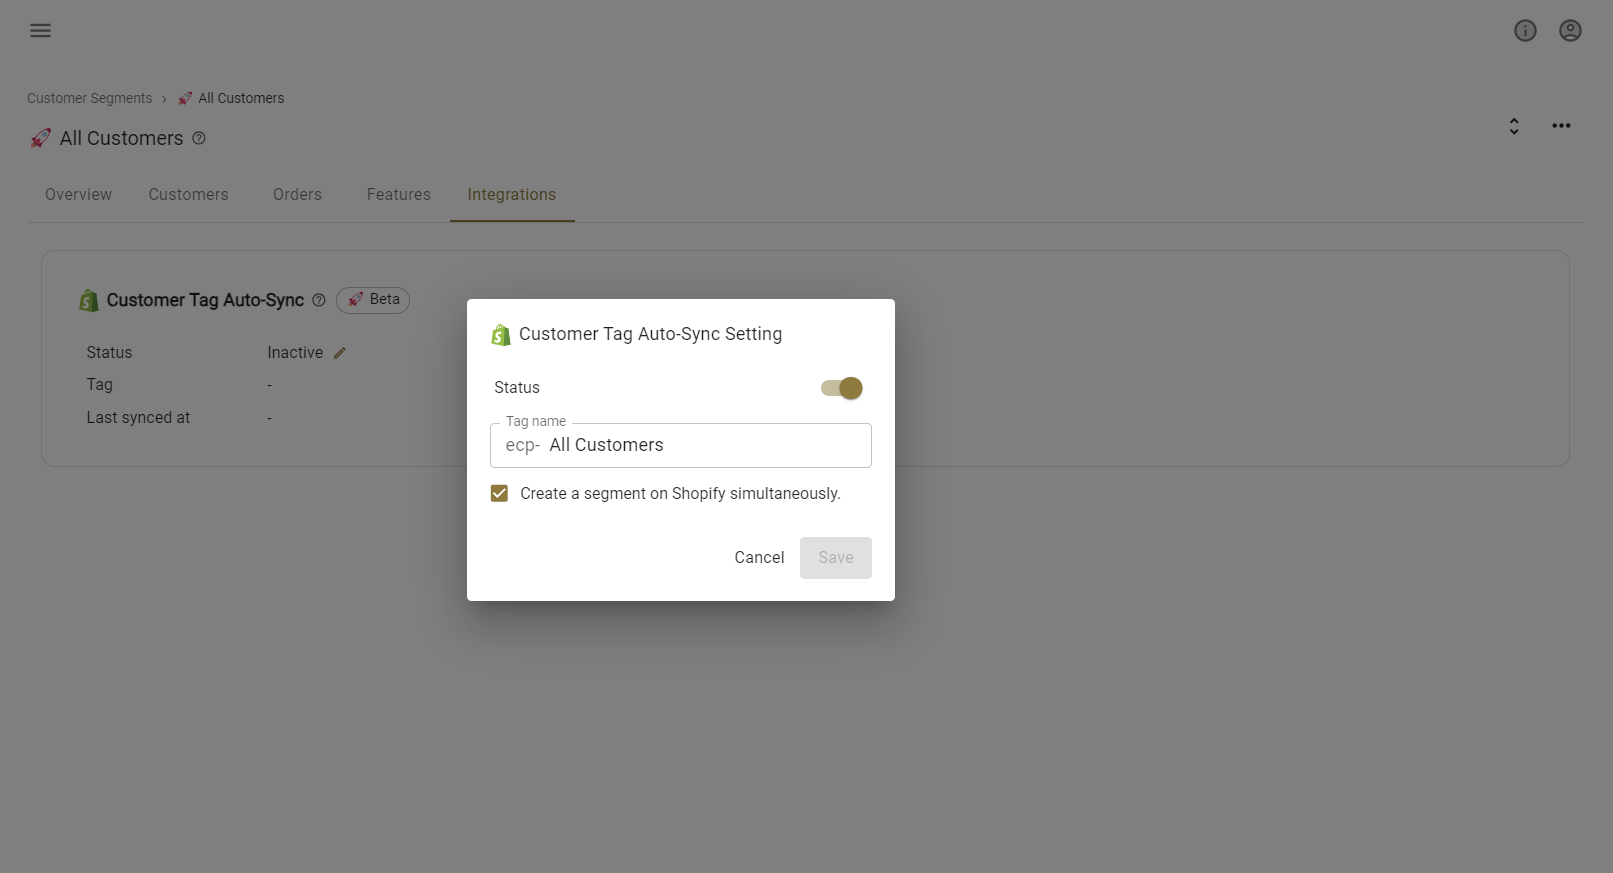
- Open the "Integrations" tan of the segment detail page.
- Click the icon on the right side of the “Status” to open the settings, then turn the status toggle ON, specify a tag name, and save.
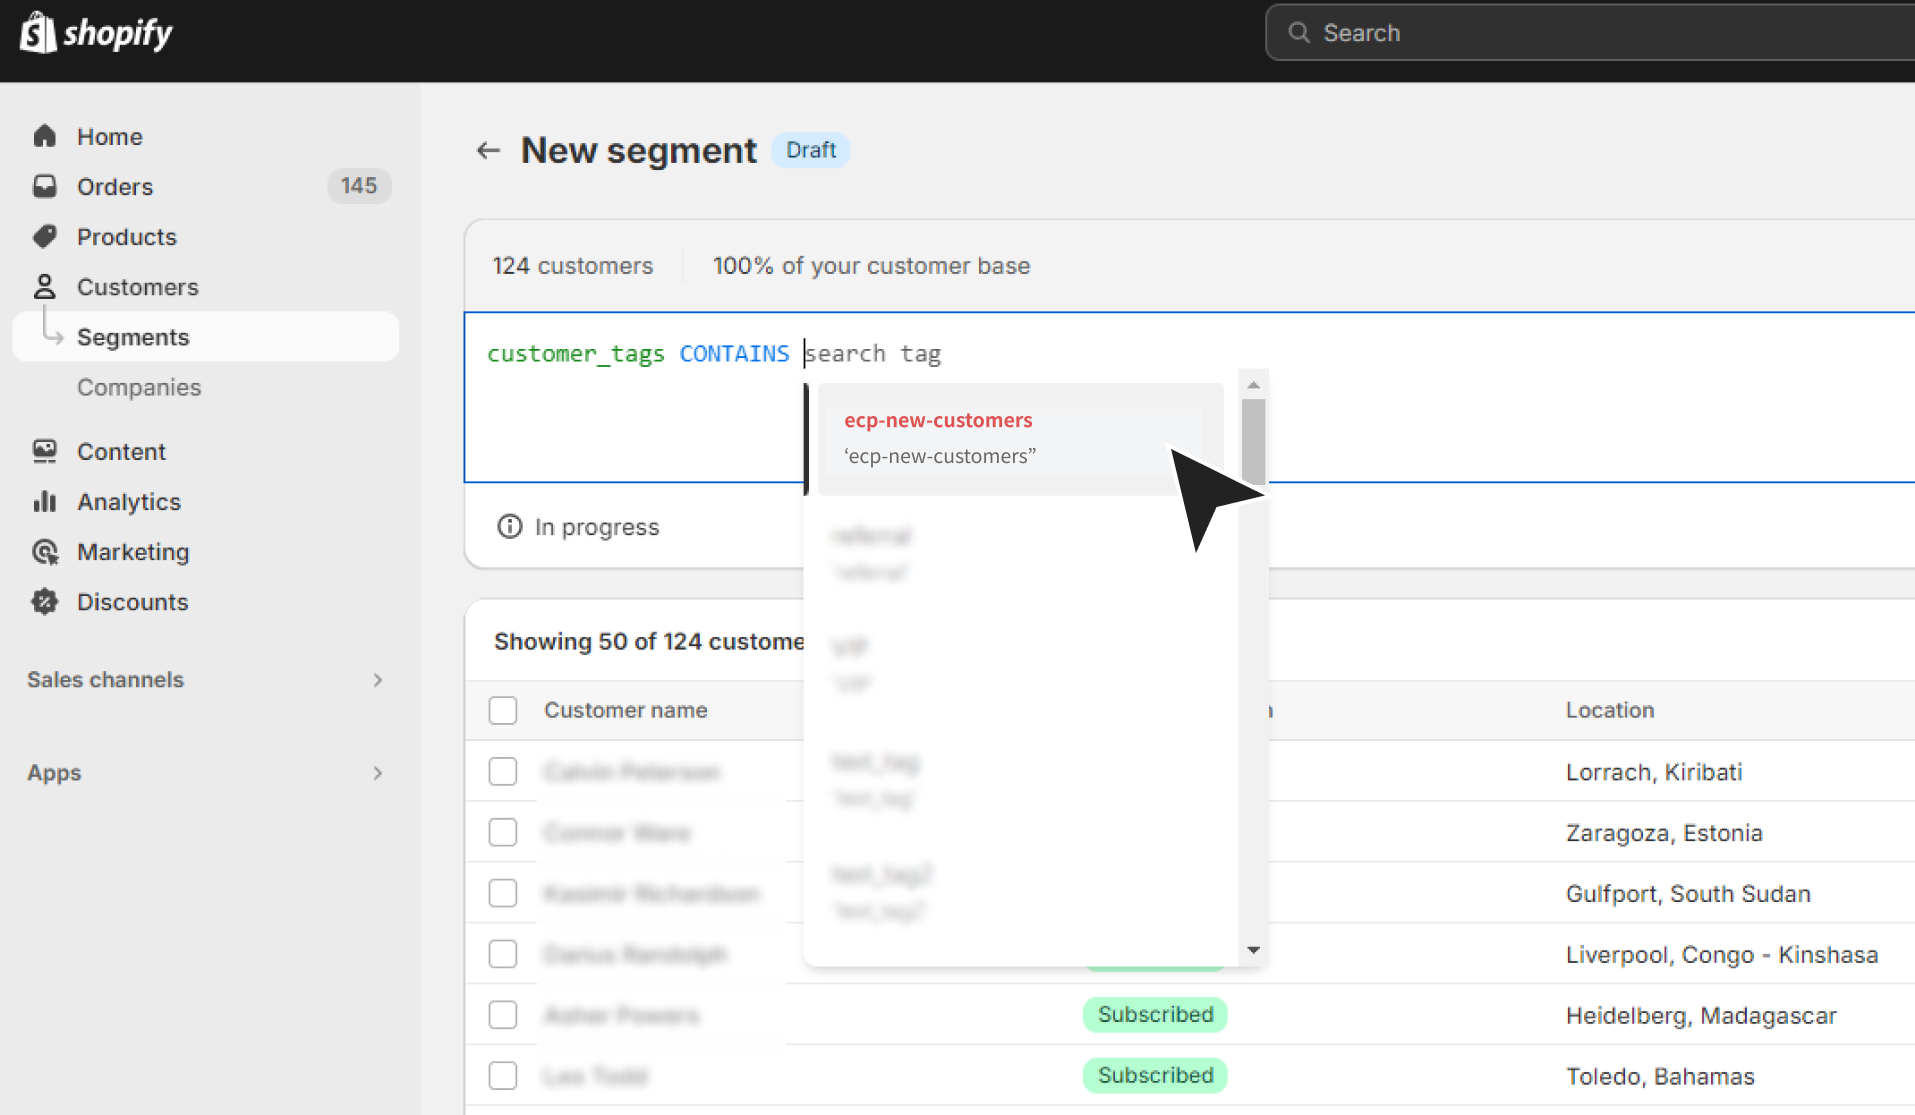
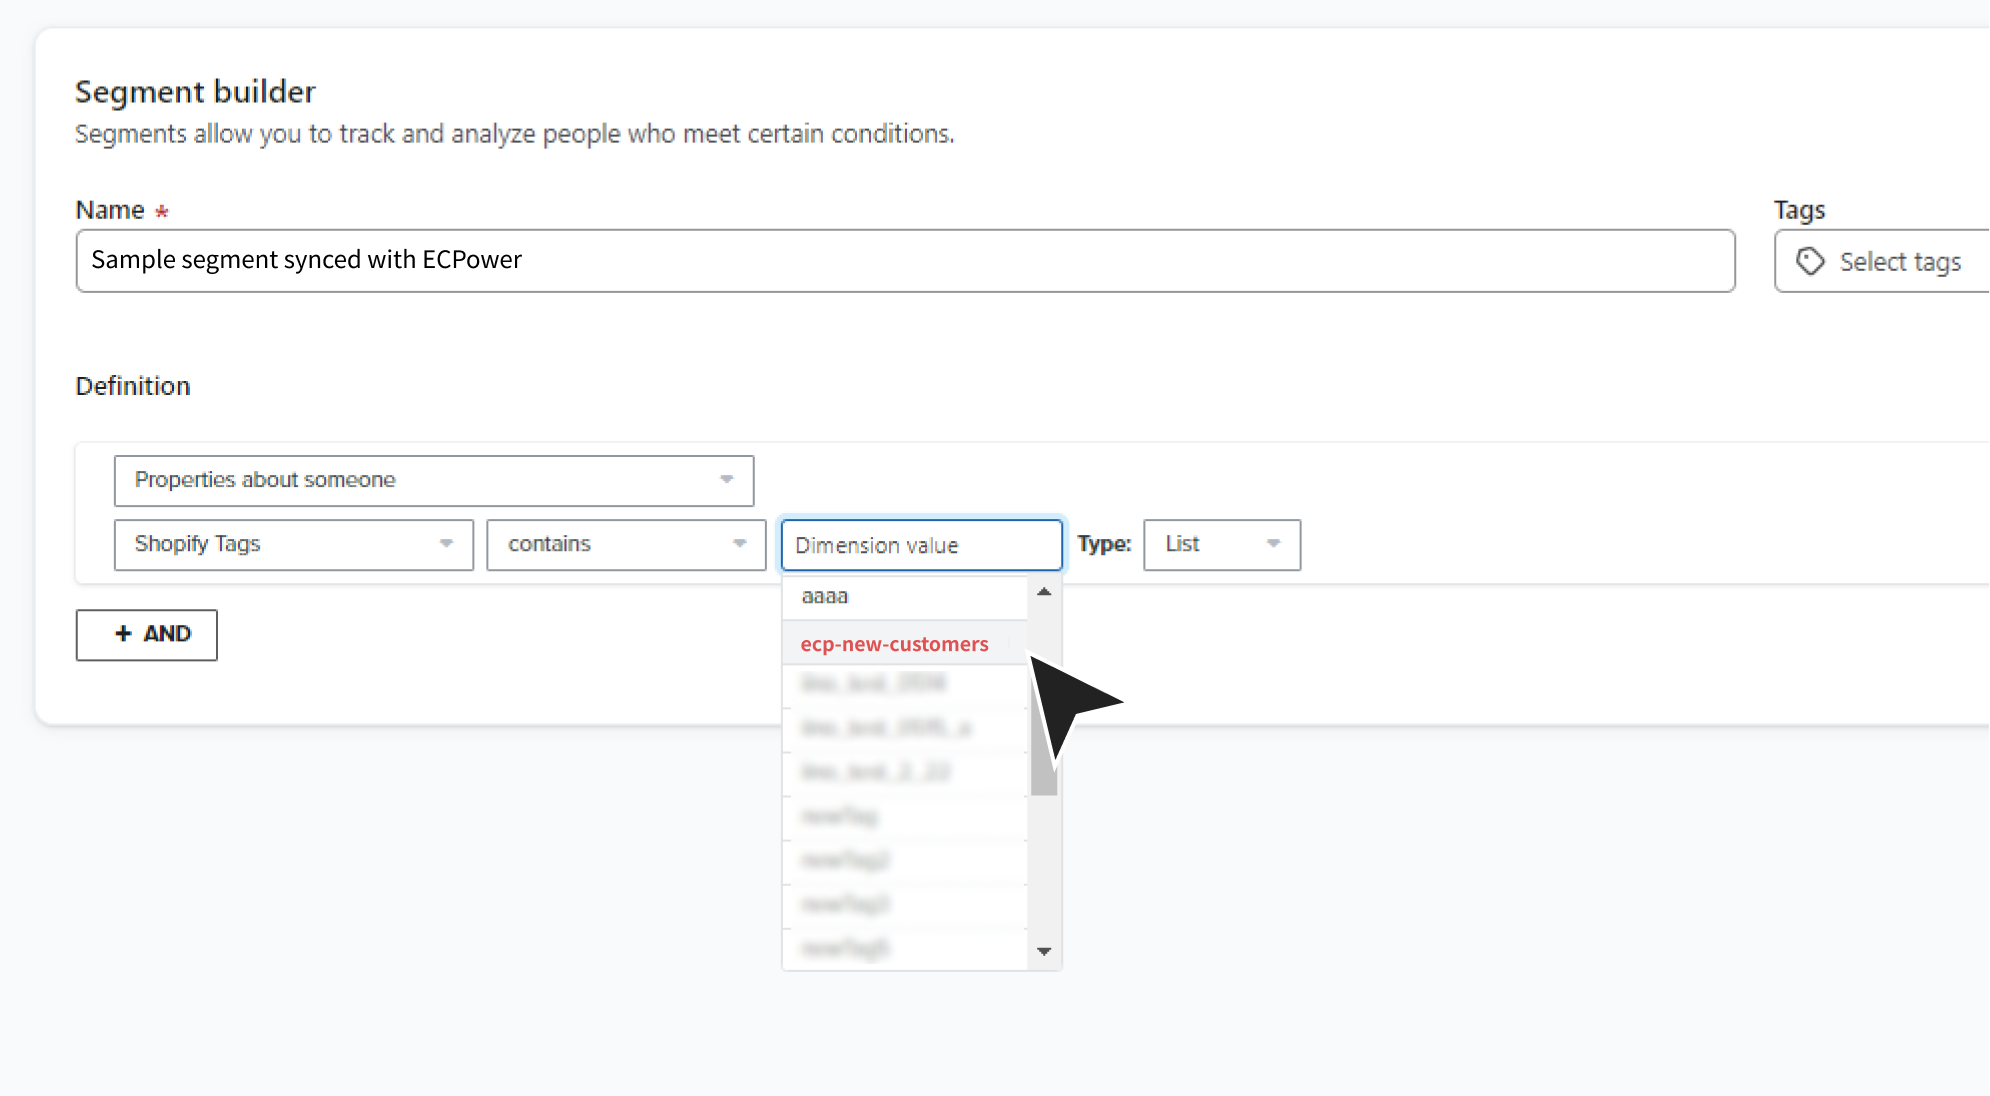
- The prefix "ecp-" is automatically added to the beginning of all customer tag names, making it easier to search in other tools.
- When you turn the setting “Active”, the process of initially assigning customer tags starts immediately. Once the status shows “Active”, the initial tagging is complete. Notification will also be sent by email.
Option - Create Shopify Segments Simultaneously
This feature allows the creation of segments in the Shopify admin interface, which include the specified Shopify customer tags as conditions, simultaneously when auto-sync is set up. This ensures that customer segments managed in ECPower are fully synced with segments in the Shopify admin interface.
- The segment name in the Shopify admin interface will be created based on the customer tag name specified in the ECPower auto-sync settings screen. If you need to change the segment name in the Shopify admin interface, please edit it from there.
- If auto-sync between customer segments and customer tags is deactivated in ECPower, the linked Shopify customer tags will be deleted, but the segments in the Shopify admin interface will not be deleted. Please manually delete them if necessary.
Disable Automatic Sync and Remove Customer Tags
- Click the icon on the right side of the “Status” to open the settings, then turn the status toggle OFF and save.
- Turning the setting “Inactive” immediately starts the process of deleting all specified customer tags. Once the status shows “Inactive”, the deletion process is complete. Notification will also be sent by email.
Estimated Time
The initial assignment and removal of tags may take some time depending on the number of customers.
Important Tips
To remove Shopify customer tags given by ECPower, always use ECPower for this task.
Deleting tags directly in Shopify or using other apps might mess up the syncing process.
If you've mistakenly removed tags in Shopify or through another method, you can fix things by switching the auto-sync feature in ECPower “Inactive” and then back “Active” again. This resets everything to how it should be.